In this tutorial, we want to show the world what can be done with the Thin Air Press vacuum bag process. And we also want to continue to challenge ourselves to think outside the box and do something fresh with graphic application.
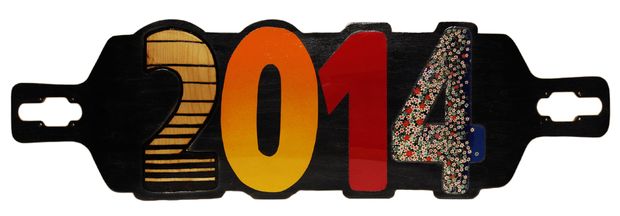
This first deck in the series is a very unique double drop deck (1" drop deck with drop through truck mounting) that we created to show off four unique graphic applications.
1) Combination of Router and Pyrography
2) RockitLam
3) Spray Paint with Stencil
4) Decorative Paper Overlay
**NOTE: We will be posting a thorough tutorial on how to make the cutouts for the drop through truck mounting in a separate tutorial ...stay tuned!
We hope you are inspired by some of these applications, and challenge yourself to make some truly one-of-a-kind boards in the near future! As always, we'd be happy to help answer any questions you may have :)
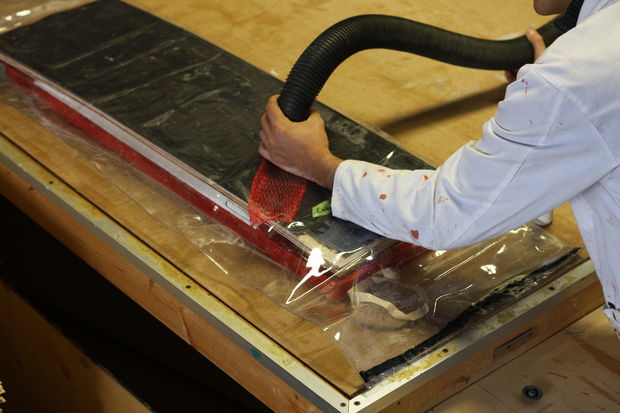
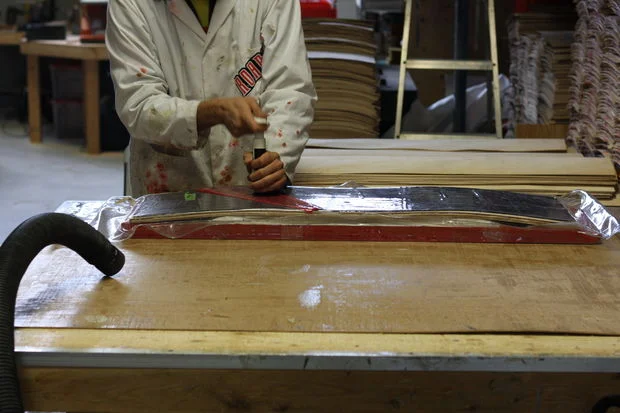
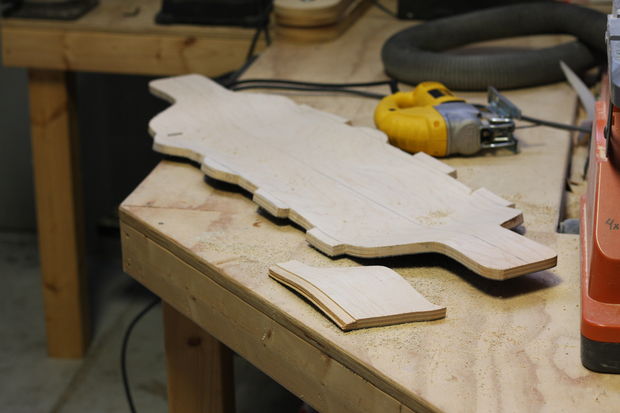
Step 1: Pressing the Board


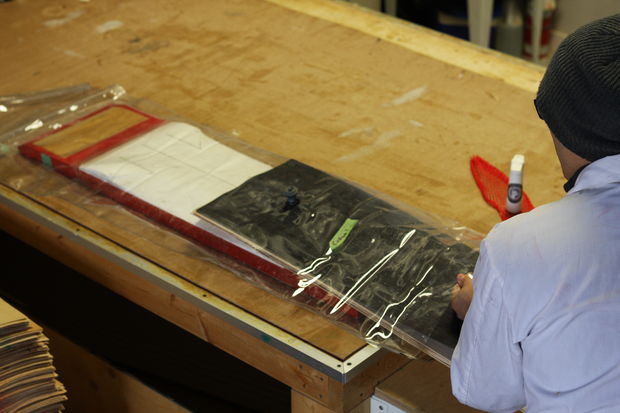

If you have followed our other tutorials, the pressing process may be getting a little repetitive by now. The basic principles of laminating a deck using the Thin Air Press (TAP) vacuum bag process is almost always the same. so we will let the photos do the talking for the most part.
If you are not familiar with the process, check out our How to Make a 1" Drop Deck tutorial or watch the video below for basic pressing techniques.


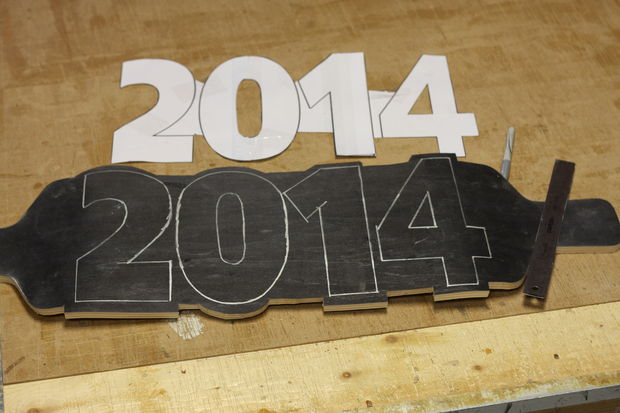
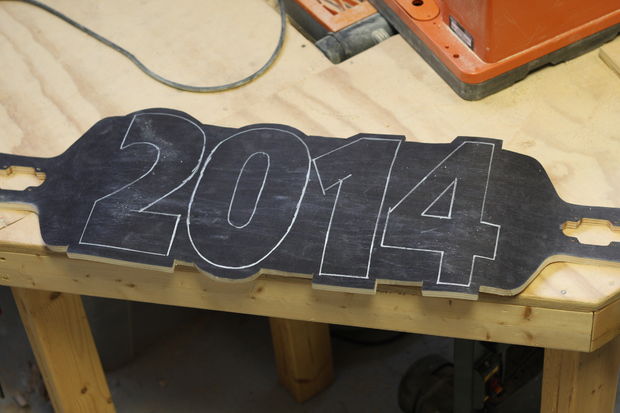
Step 2: Cutting a Custom Shape


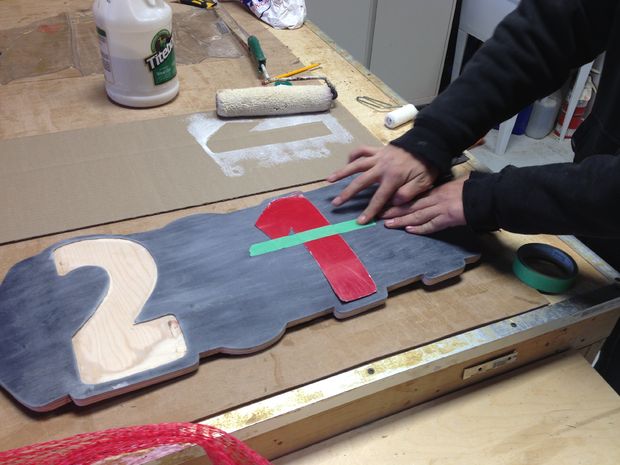
To prepare for our graphic applications, we wanted to start by giving the deck a totally unique shape that would highlight the numbers '2014'. To do this, we printed our numbers to scale and laid them out on the deck so we could trace the outline of the numbers themselves. Tracing roughly 1/2" around the numbers, we were able to create a shape to cut out the board.
This takes a bit more time than cutting out your average symmetrical deck shape, but helps to make it truly unique.

Check out our video that covers cutting out your final shape after it has been pressed:
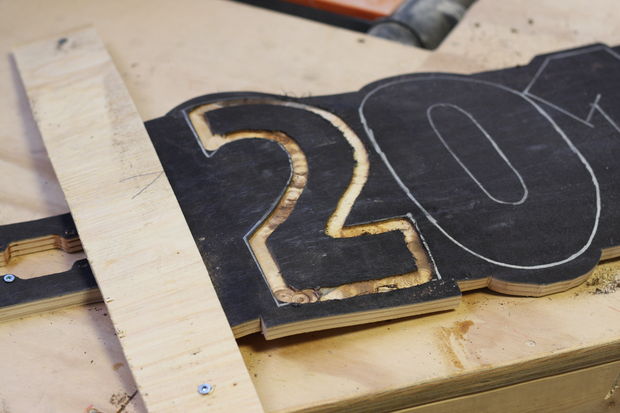
Step 3: Router the shape
To start, we set up our handheld router with a straight flute router bit that sat about 3/32" below the base of the router plate. This will ensure that the bit cuts enough material to fully remove the top 1/16" layer of black veneer.

We screwed the deck to our bench through the truck holes to help keep it in place as we routed out the material. We also set up some guides using a flat piece of wood to help router the flat edges of the number '2'. To do this, we measured from the edge of the base plate to the outside edge of the carbide blade on our bit and then set our guide the same distance.

The curved portions and the inside material that needed to be removed from the number were all done freehand with the router. This takes a slow, steady hand (both hands actually) and a bit of experience to perfect. Try practicing on a scrap piece of material before ever taking a router to your final project.

Once the rough cuts were made with the router, we spent some time cleaning up the interior of the number with a combination of chisels and sanding until it was nice and smooth.
STEP 4: Pyrography
To give it that extra bit of flair, our resident pyrographer Chris "Burns" also known as Champstiles used his wood burning pens to add some details to the board.
Pyrography on maple works really well (and smells great too!)
It takes a steady hand, patience and quite a few hours but the results are striking and well worth the effort.


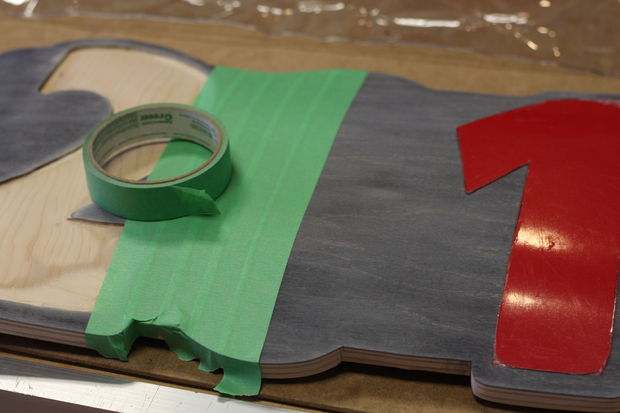
Step 5: RockitLam
For the '1' we decided to laminate a small piece of our Hi-Gloss Red RockitLam to the bottom of the deck.
To do this, we simply laid out the outline of the '1' onto the RockitLam and cut it out carefully with a sharp utility knife. Once the shape was cut out, we smoothed out any rough edges and sharp corners with an edge sander.
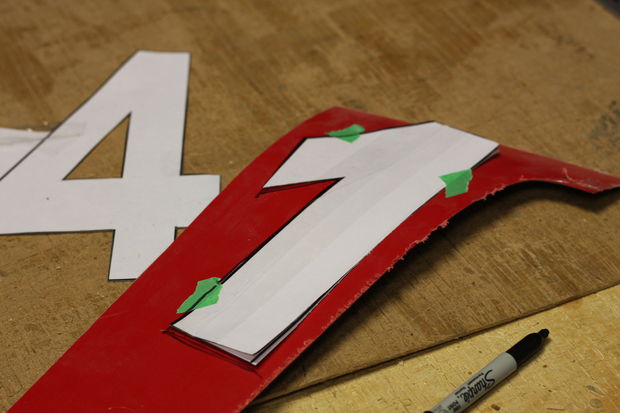


With the RockitLam shape ready to apply, we rolled on an even coating of Titebond III glue to the back side and taped it into place on the bottom of the deck.

Once the number was in place, we put it back in the TAP bag and evacuated the air to let it adhere.
After 8 hours in the bag, the number was set in place and formed to the curves of the deck itself.

Step 6: Spray Paint
For the number '0' we wanted to use a very common method for applying graphics to a deck.
By taping off an area of the deck and cutting out an area of exposed wood, we were able to create a nice clean stencil for spray painting.
To start, we laid down tape over the whole area where the number would be applied.
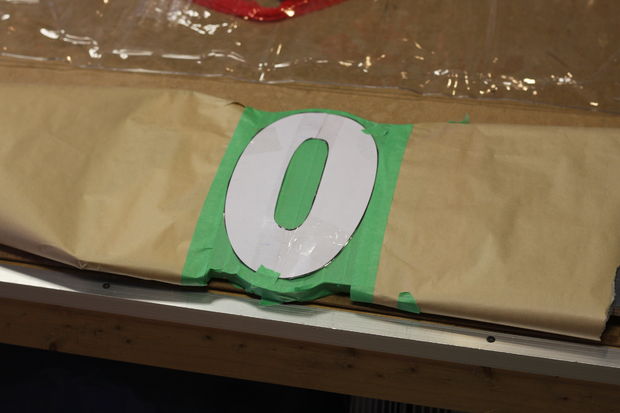
Once we covered the area with tape, we traced the outlines of the '0' and removed the parts where we wanted to add colour.


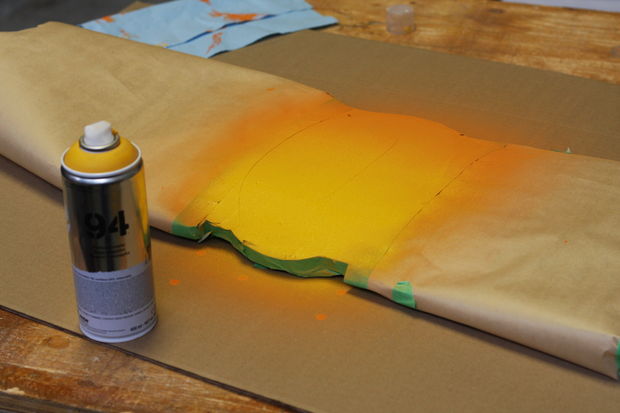
Before spraying the exposed wood, we covered the whole board in paper to protect the deck from any accidental over-spray.
Once everything was adequately covered, we sprayed on multiple layers of one colour and once it was dried added another colour to give it a gradient effect.


Once the paint had fully dried (about 1 hour) we removed the tape and paper from around the number.

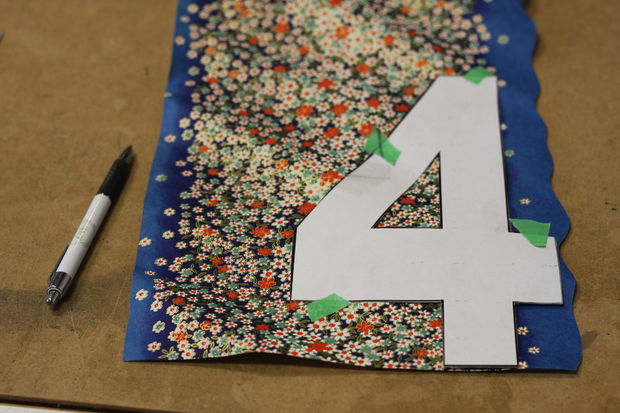
Step 7: Decorative Paper Overlay
Last but not least... the number '4'.
For this number, we wanted to apply a fancy piece of decorative paper to the bottom of the board. This is a great example of how to make use of the even clamping pressures applied by the vacuum bag process. Fancy paper like this can get quite expensive, and you want to make sure that it sits flat, doesn't rip and is evenly adhered to the deck.
First we used our template to trace and cut out the number '4' from the paper.


Once the paper was cut to shape, we applied a light coat of all-purpose white glue to the back side of the paper.


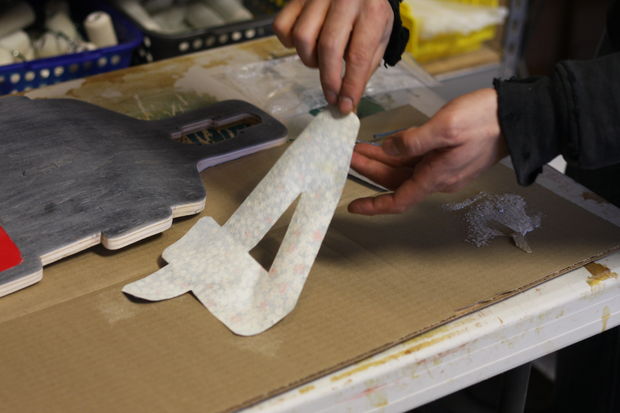
Once the paper was glued up, we carefully applied it in position to the deck
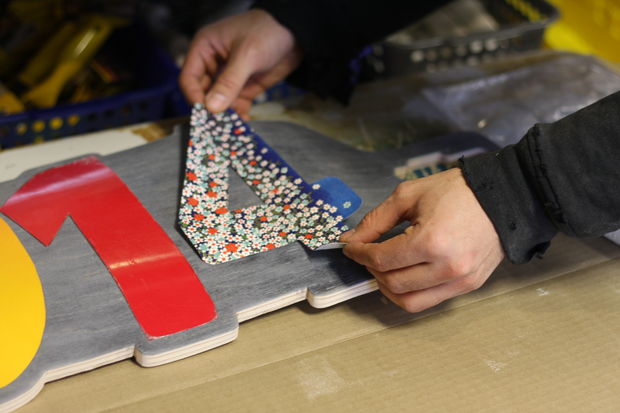
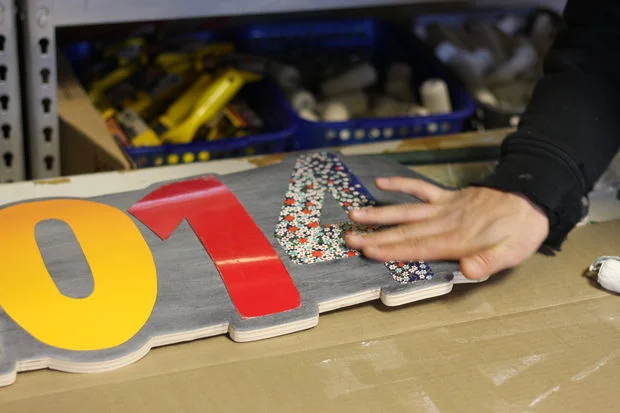
It went back into the TAP bag for a few hours to cure.
Using the white glue, and having applied such a light coating to the paper, we did not need the same 8 hours in the bag to dry.

Step 8: VOILA!
After applying several coats of a high gloss protective finish (we used Krylon Triple Thick spray) and sanding the board smooth, we are finally finished our One-of-a-Kind double drop deck.

The board was really fun to make and we actually learned quite a bit as we went along as well!
The whole team at Roarockit hopes you enjoyed the tutorial and we look forward to sharing our experiences building more crazy decks as the year goes on.
