
Two Inch Drop Deck
Many people ask if it is possible to make a drop board using our Thin Air Press. This tutorial goes through the process involved to making this type of deck.

The Purpose
My idea was to build a good looking cruising drop board that was light and not overly stiff and 8 layers of veneer gives it some flex. I didn’t envision this deck for going fast, just for cruising around town.
When I first started the build I designed a rounded form to the top profile to the deck. You will notice this shape on the template produced for the build. At the end of the laminating process I decided to change the design to be more like the stealthy Cadillacs you see on the road today.
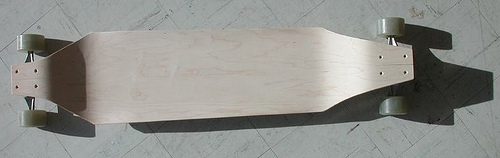
When the deck was finished I found the rider stance particularly good (I am probably not the best judge of this) as you can really lock your feet in between the front and back drop sections while riding. The deck has a nice wide flat area in the middle with about a 3/8″ concave at both edges.
In order to properly build this deck it is essential to review one of these FOOLPROOF DIY SKATEBOARD FOAM MOLD BUILD to see how to design your deck templates and how to shape your foam mold.
This is an advanced deck build. It is highly recommended, if you have not built a deck using our Thin Air Press technology please start with one of our basic deck kits to get familiar with the process of laminating.
Drop Deck Measurements
The drop is a full 2 1/4″ bottom to bottom…..needs big wheels.
Width (widest point): 10 3/4″
Length: 41 1/4″
Concave: 3/8″
Layers: 8
Tools Needed For This Build
- 20x70″ TAP Kit (with pump and breather netting)
- 2 Woodworking Clamps (deck can be built without woodworking clamps but process will take longer)
- Long flexible straight edge, such as a 36″ stainless steel ruler
- Jig saw or band saw
- 12″ Surform
- Hand Surform and if possible a small spoke shave
- Foam block with sandpaper glued to one side
Materials Needed For This Build
- 42″ X 11″ X 2″ slab of high density mold foam
- a flat 3/4″ piece of plywood 42″ X 11″ (the same length as your deck)
- 4 pieces of plywood approx. 3/4″ X 11 x 4″
- a 1/4″ X 11″ X 4″ piece of foam (I used 1/4″ pieces of felt)
- double-sided tape or spray adhesive
- 9-Layer Set of 1/16″ Maple Veneer (Note: this deck cannot be made using 1/8″ Baltic birch)
- Titebond III glue (at least 2 16 oz bottles, or even have a gallon jug handy)
- Thin-nap roller for glue
- 2 elastic bands
Step 1: Setting Up For The Build
Follow the instructions in my Skateboard Foam Mold Build to design your templates.
Cut your 2″ thick mold foam sheet to the total length of your deck (my foam is 42″ X 11″).
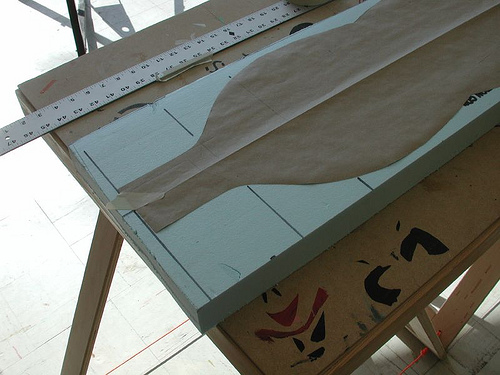
Here is my original top profile cut from paper. Remember, you can always change it after you have laminated your blank.

It is important to correctly design your templates as it will give you the measurements for laying out your cut lines on your piece of foam. The templates can be reused to design many future decks. It is good to file your templates away somewhere safe.
Step 2: Template onto Mold Foam
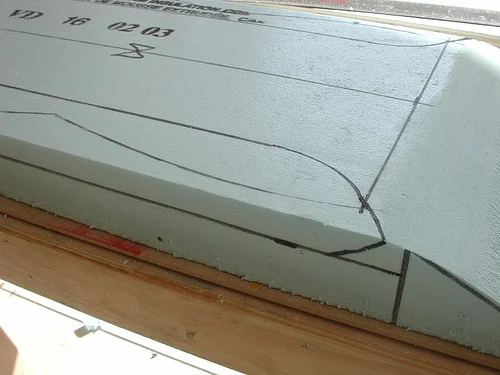
Here you can see I have transferred my lines onto the foam.
The truck base locations are marked on the template. This gives me an idea as to the width and length of the drop area.

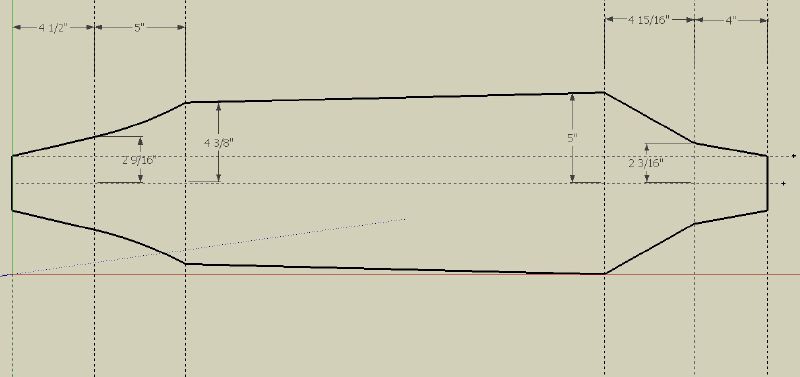
This is the shape I finally decided would work for this build. I laid out my measurements and used Google Sketch to do the drawing. The overal length of the deck became 41 1/4″. Larger image here

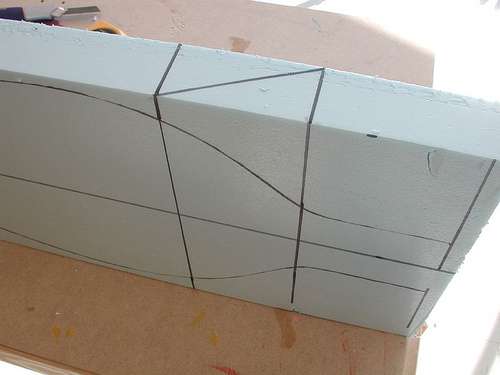
Back to my original design: I have transferred all my measurements to the foam using a black marker. Make sure you have drawn a center line along the length of the deck.

Now add the side profile lines of the drop section wedge

Step 3: Shaping the foam mold
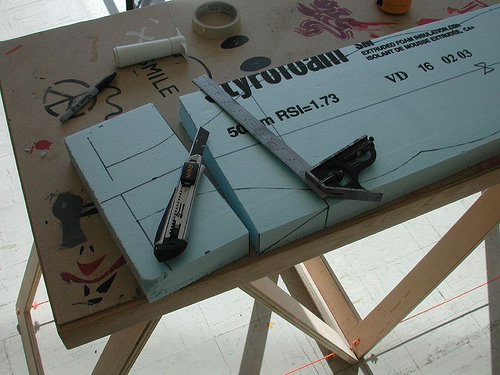
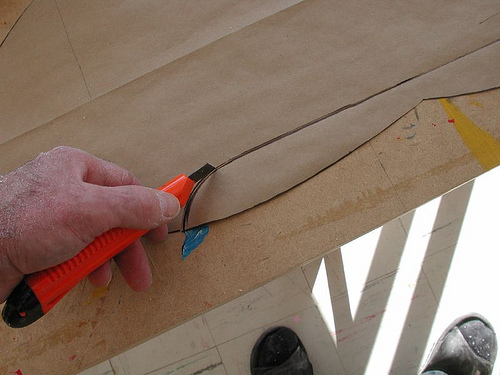
Take a sharp utility knife and cut down both ends of the foam as shown. Make sure your cuts are very square.
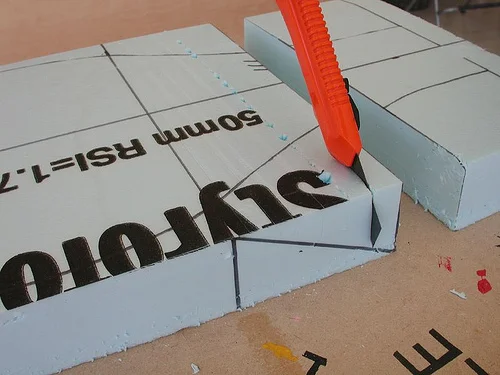
Cut out your drop at either end of the foam mold. Score the foam with a utility knife and remember not to cut past the black line. For more information refer to the Skateboard Foam Mold Build tutorial


If you take the knife and slice horizontally you will be able to remove all the excess
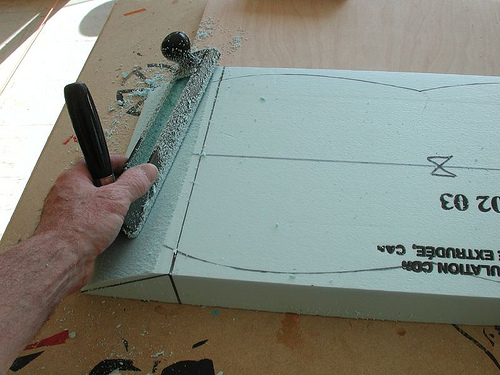

Using a Surform, rasp as closely as possible to your template lines without going through them. Always rasp ACROSS the mold.
This is as close to the line as I get with the Surform.

Using a foam block with griptape (or sandpaper) glued to one surface, sand across the form until you are at the template lines. Repeat the surform and sanding steps to the other end of your deck
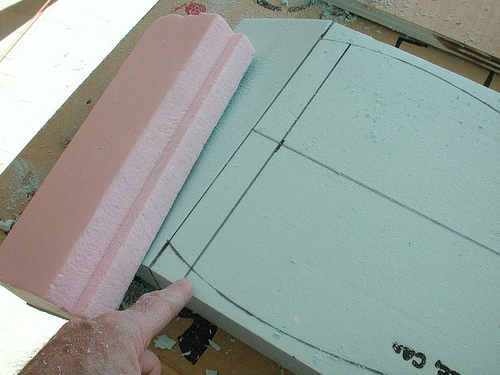

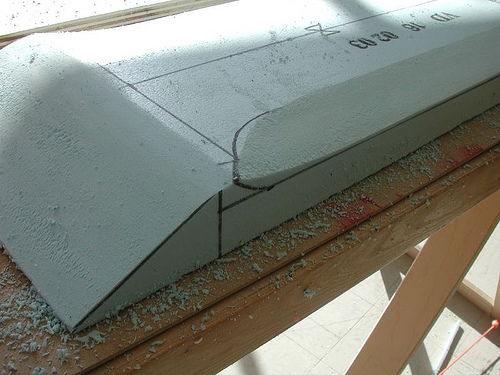
Once you have finished beveling the foam mold, draw a secondary line about 1″ from the top line as shown below
Slightly round off the top corner of your mold. Do not sand beyond your 1″ line
Step 4: transfering the perimeter shape onto your foam mold

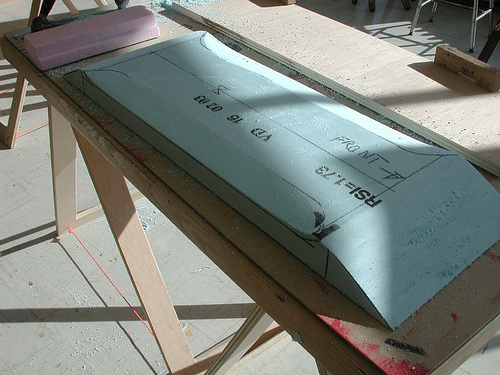
Your mold should now look like a rectangle with wedges on either end. Place your paper template on top of your mold.
Draw your concave lines onto your paper template.

…and cut out the shape.
Use the template to draw these lines onto the foam mold.
Using your Surform and sandpaper block, shape the concave on either side of the deck.
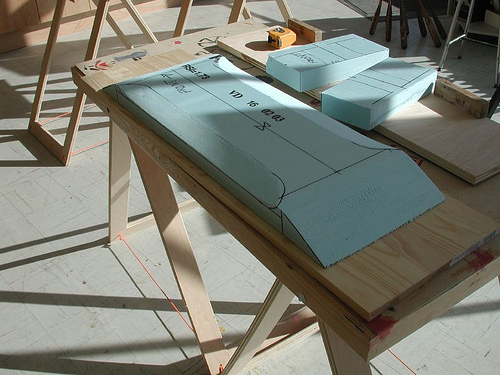
That’s all you need to do to the foam.
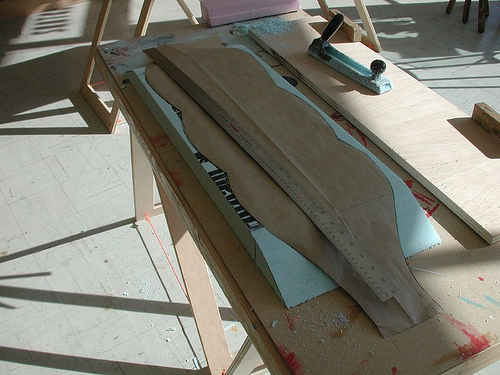
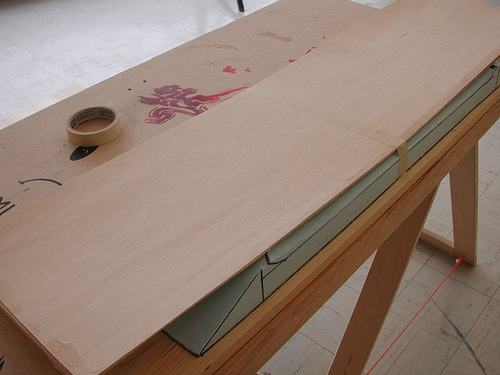
Step 5: Prepare your pressing setup
The next step is to cut a piece of 3/4″ plywood 11″ wide by 42″ long. (particle board or solid wood would also work) You can see I have placed the solidwood (pine) underneath the foam.
I attached the foam to the plywood with spray adhesive. You could also use double-sided tape for this. Make sure you follow the measurements from your template for this step so that your veneer will be supported by the plywood.
Unlike the photo below, the width of the foam and your plywood should be flush. (I had to trim my plywood down to fit inside the TAP bag).
Your mold is complete and ready for the veneers.
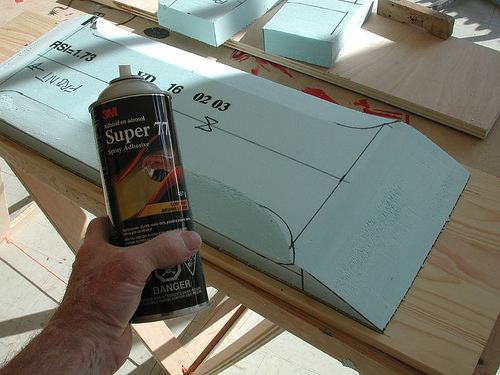
Step 6: Gluing Process
Use a thin-nap roller to spread an even layer of glue onto your first sheet. Spread the glue evenly over the entire surface of the veneer. I used a bit of tape to center the 2 veneers onto the mold. If you are not experienced with gluing veneers for use in a TAP bag refer to FOOLPROOF DIY SKATEBOARD FOAM MOLD BUILD. Timing is critical for the laminating steps.
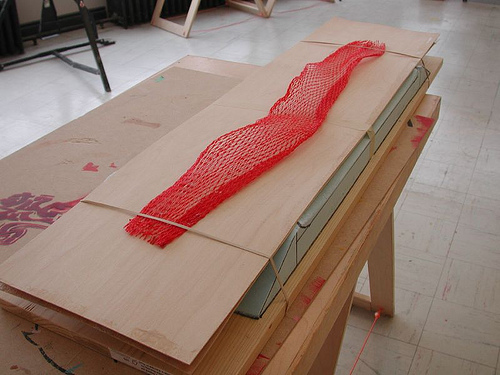
Use an elastic band at either end of the mold to hold the veneers in place and tuck the breather netting under the elastic bands.
Because of the extreme bends of my deck, I pressed only 2 sheets of veneer at a time.
You have to work quickly to glue the veneer and seal it into the bag. This is what it should look like once you have pumped the air from the TAP bag.
You will need to push the veneers down at either end of the deck by hand as you pull the air from the TAP bag. This will prevent the TAP bag seam from being stretched into the gap between the mold and veneer. The TAP seams need to be under compression, not tension which will cause the seam to fail.

A closeup of what the drop looks like: there is more than enough pressure to firmly press the layers around the mold.
The vinyl will want to creep between the mold and veneer while pumping the air from the TAP bag. Before all the air is out of the bag, pull the vinyl firmly away from the mold, then pump the remaining air from the bag.


This shows the two layers glued together after removing it from the TAP bag. The two layers of veneer will be pretty flexible, but that will change when more layers are added. Using Titebond III, I was able to do the next glue up 4 hours after the first. (you must do the next pressing immediately)
Here are four layers glued......
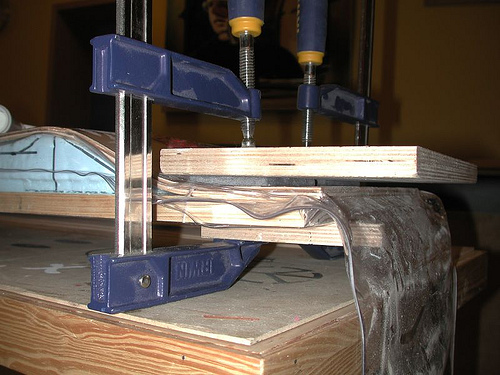
Step 7: External Clamps
Before the next glue up I decided to try clamping 11″ X 4″ pieces of plywood onto the top of the drop curve as shown below. You should not place clamps directly against the TAP bag. I placed 1/4″ felt pads between the plywood and TAP bag, newspaper or even 1/4″ cut foam would do the trick. This step is not necessary but helps to ensure the drop area is flat for the truck mounts.
I continued to glue and press veneers two at a time. To be really sure there are no gluing mistakes (which would result in a delam), I recommend doing the glue up one sheet at a time.


… six layers …
… and the final 8 layers are in the press.
This time I waited 8 hours before I took it out of the press to make sure the glue had lots of time to dry. The whole gluing/pressing process will take a couple of days if you can do a glue up every 4 hours.

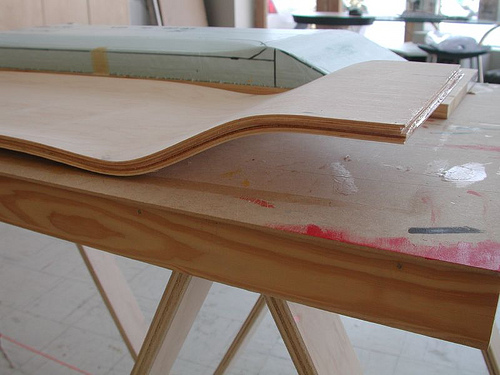
Here is the final blank. Lots of shape! The mold can be used for many more drop decks.

Step 8: Trim out the board shape
Draw a center line along the top of your blank, then using the measurements from your paper template, draw the top profile of your design onto the deck blank.


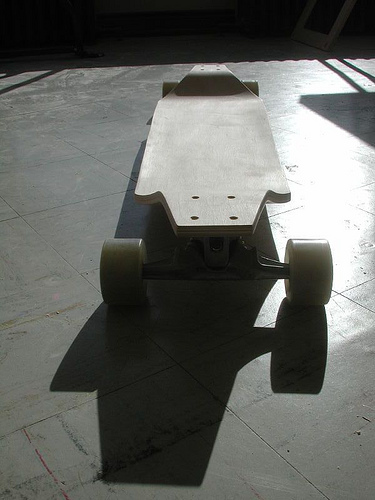
The final step is to jig saw (or bandsaw) out the top profile of the deck. Once you have done this, a hand-held Surform and small spoke shave will clean up the edges of the deck. On my deck, I decided to make flat planes on the edges with a slight round-over. I sanded the top and bottom of the deck with 100, 150 and finally 220 grit sandpaper.
I think this deck is fantastic and hope that you use this tutorial as a guide to create your own sweet ride.
Ted Hunter

