
External Mold Build
EXTERNAL MOLD LAMINATION
This tutorial is about using an external mold with the Thin Air Press. Sometimes building a simple wooden form that veneers and the TAP bag can be externally wrapped around, is a better solution than using an internal mold.
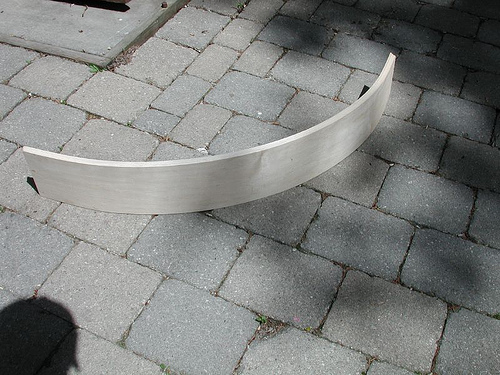
This form was created for a friend who needed a 1/4 round piece of wood as part of his display sign.
To quickly build this piece and without needing an oversized bag to contain both the mold and veneer, I built an external mold that the TAP bag would be wrapped around. Also, I could then use a stock 14″ x 47″ TAP bag.
Tools needed:
Sharp knife
Screw driver
Thin Air Press
4 wood clamps with 4 wooden blocks cut to 6″ long
Paint roller, preferably with a close nap
Materials needed:
1/16″ veneer (I used 11, 6″ x 43″ long pieces for this build)
Glue
3/4″ plywood for building the wooden mold
1 1/2″ wood screws
Hockey tape (or masking tape)
What veneers to use
I wanted my finished thickness to be around 3/4″ so I used 11 sheets of 1/16″ thick veneer. I chose maple veneer, but any veneer would have worked for the laminating. When selecting your veneers, make sure that you can bend a single layer of it around the mold or form you have made. If you can bend one layer around your form you will be able to bend multiple pieces using a vacuum bag system.
We sell 1/16″ maple veneers for building up thicker woodworking projects. Here is a link to our veneer.
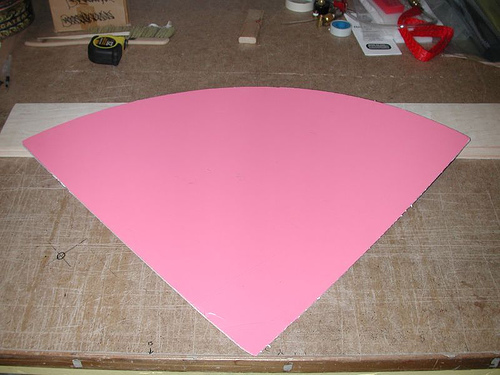
Paper or card template
Using a large compass to draw an arc, I created my template. 1/8″ masonite works well if you have a bandsaw to cut it out, heavy card or cardboard will also do the trick.

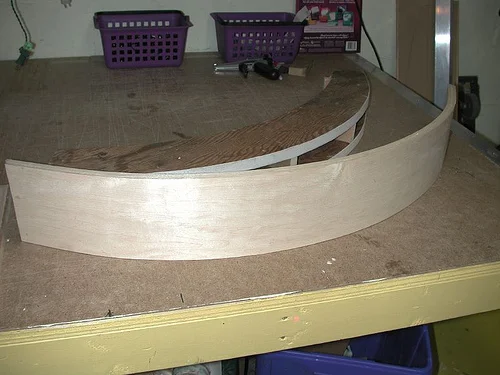
Here is a look at the mold. With my card template as a guide, I cut out two identical plywood forms using a jig saw. (make sure you cut the shapes as close to the template as possible)
I cut out 5 blocks that were 3″ x 1-1/2″. These I used to join my two plywoods form together. You can make your blocks so that the width of the mold ends up being the width of the form you are trying to bend. I used 1-1/2″ screws and made sure that the blocks were mounted flush to the outside edge of my 2 forms.
I lightly sanded any rough spots and applied hockey tape to the outside edges to help keep the vacuum bag from being punctured when clamped to the form during the laminating step.
Cutting out the veneers
Using a utility knife to cut my veneers, I cut 11 identical pieces 6″ x 43″ long. I added 1/4 of an inch extra width to each piece as the veneer layers do not always align properly while pressing. I do the same with the length of the veneer pieces, always leaving them a little extra long. My finished piece was 5-3/4″ x 40″.

What glues to use

There are many types of glue that you can use for veneering. You want a glue that advertises a long wet time. Epoxy glues (like West System) work well and have the advantage of not swelling the veneers like water-based glues. Unfortunately, epoxy is fairly pricey and toxic smelling while curing. Water-based glues, like woodworker’s glue, work well for veneering but special consideration has to be taken for veneers expanding because of the water in the glues. I use Titebond III as it has a 9 minute wet time and is waterproof after curing. A quality polyurethane glue will also work for this project. I use a short napped roller to evenly apply glue over the entire surface of the substrate. A thick build up in only one area will cause the veneer to pucker while pressing – an even coat is a must!
Prep your workspace
It is time to prepare your workspace for pressing. There are many ways to press your veneers. You can invest in an electric vacuum pump and bag system for vacuum veneering or you can use the Thin Air Press kit from Roarockit. Whatever you use, make sure you are familiar with the process before proceeding. Doing a dry run, without glue is always advisable when pressing veneers. Have all your materials and tools prepared and ready, including the glue, veneer, roller, (in this case) the Thin Air Press vacuum bag, breather netting and finally, the manual vacuum pump. Make sure you have everything close at hand when you begin your glue up as you have limited time for applying the glue before it starts to dry
Glue and Press
After you have put glue on all of your veneers, quickly place the veneers into the Thin Air Press bag. Place the supplied breather netting overtop of the veneer. This material allows for even evacuation of the air from the TAP bag while pressing. Make sure that your project is centered in the bag.

Peel the paper from the sealing tape and pull firmly on either side of the TAP bag, stretching the bag flat along the sealing tape. Take your finger and carefully press the sealing tape to the vinyl TAP bag. As you do this, try to work from the inside of the bag towards the outside. Look for any light colored areas where the tape is not firmly pressed down. They will be very visable and only need a little thumb pressure to remove them.

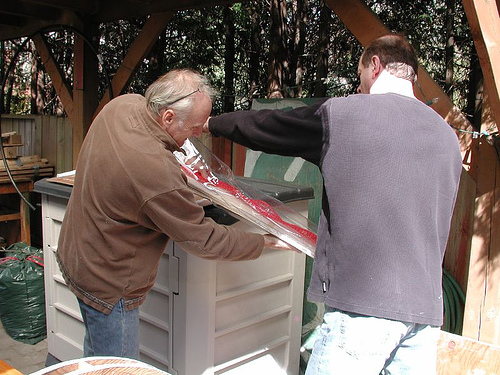
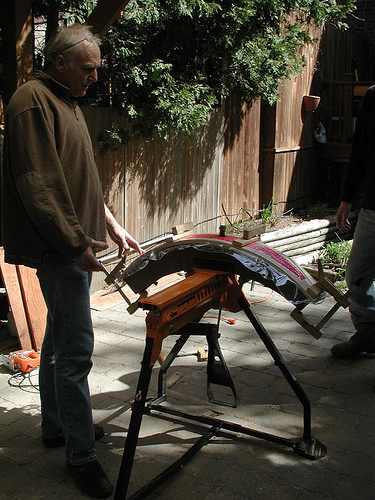
Place your TAP bag with the enclosed veneers on top of your mold. Try to align it so that the veneers sit evenly along the mold when pressed down and that the veneers are equal in length at either side of the mold.
Using one of the wood clamps and a pre-cut block, lightly clamp the TAP bag and veneer to one end of the mold.
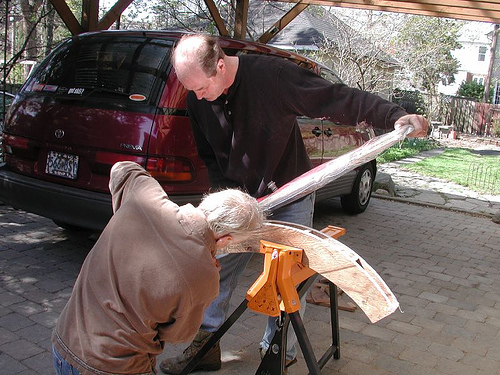
Then gently bend the veneer over the mold. Use the remainder of your clamps and blocks to clamp the veneers into the mold.
Do not overtighten the clamps. Have a look at the profile of the veneer. The veneer should be pressed evenly around the mold.
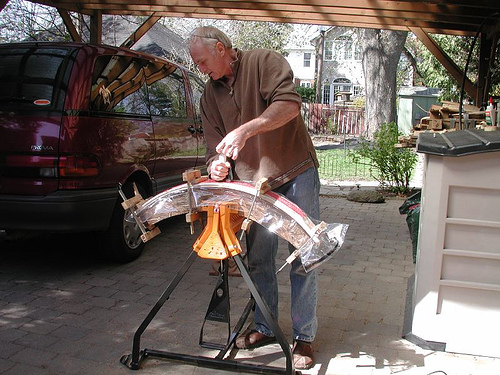

You are now ready to pump the air from the TAP bag. It should take less than one minute of fairly vigorous pumping with the TAP kit’s manual vacuum pump. You will feel when you have achieved maximum vacuum as the handle on the pump will be harder to pull and you will be unable top pull the vinyl away from your project. This will create over 13 lbs per square inch. With a project this size there will be over 2500 pounds of pressure evenly pressing down on the veneers. This is more than enough pressure to press any veneered project
That's about it!
In a few minutes, check by pulling at the edge of the vinyl to see if you have any leaks. If the vinyl pulls away from your project, inspect the sealing tape for any light colored areas where the tape is not firmly pressed against the vinyl and use your thumb to press these out, then re-pump your TAP bag.
The process is very simple and if you follow the basic instructions the TAP bag will maintain vacuum for as long as it takes your glue to dry.
I leave a project like this in the TAP bag for at least 4 hours. Check to see what the glue instructions say to be sure, as some glues take longer than others to set.
The Day After...
After the glue has dried you can remove your project. The paper strip that you took off the sealing tape should be replaced as soon as you open your bag and before you remove your project. This will prevent any flakes of glue from getting onto the sealing tape. The sealing tape is re-usable many times over as long as you keep it clean
This project will look great when finished! The process is adaptable to almost any curved form you can think of. It took me about an hour to make the mold and another hour to cut the veneers and do the pressing. I left the form in the TAP bag overnight to make sure the glue had dried completely
which, along with using multiple layers, results in
virtually no spring-back.